Tips & Techniques
Neglected dirt on your lens surface can ruin all the work behind your shots, making your final image awfully spotted or affecting its sharpness and beauty. Regular cleaning and correct maintaining of your lens is a good habit any photographer should have and get used to. However, unlike mere window glasses, the optical glass lenses are made of is a more delicate material. Therefore, the best solution will always be to choose a "lens protection filter (PROTECTOR, UV filter, etc.)" to attach on your lens.
The advantages are numerous: by cleaning the filter's surface instead, no cleaning product will ever make contact with your lens. Also, with the filter attached, the lens will be protected by accidental scratches, impacts or damages, and by simply replacing the filter with a new one, you can always shoot in the most desired and best conditions.
Filters, whatever type is used, need a correct cleaning and maintenance to preserve their good conditions over time. Here find some useful tips and easy-to-follow indications:
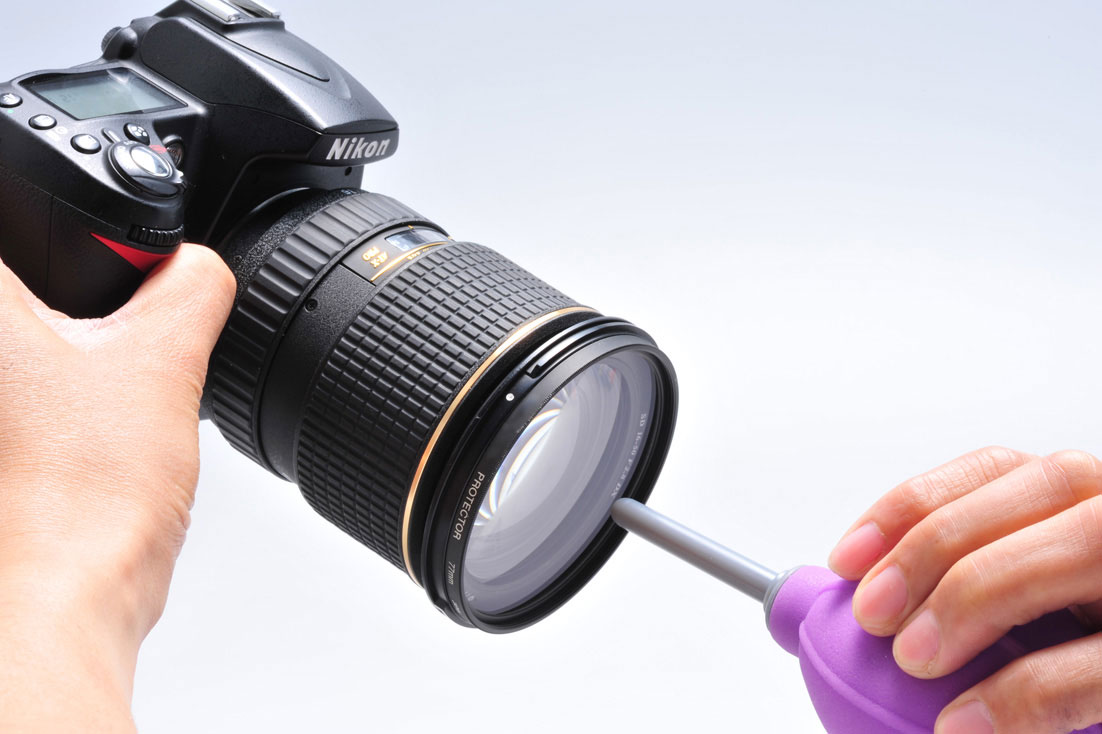
- It is not recommended to use regular tissue paper or handkerchief to wipe dirt off your filter. Instead, better using a professional cleaning cloth and cleaning liquid specific for lenses. Other tools like a lens cleaning brush, air duster and air blower are also necessary for a flawless cleaning.
- First of all, blow off dust form the filter's surface with the help of an air blower. By keeping the filter downward, you can prevent flying dust and dirt from settling on the filter's surface again.
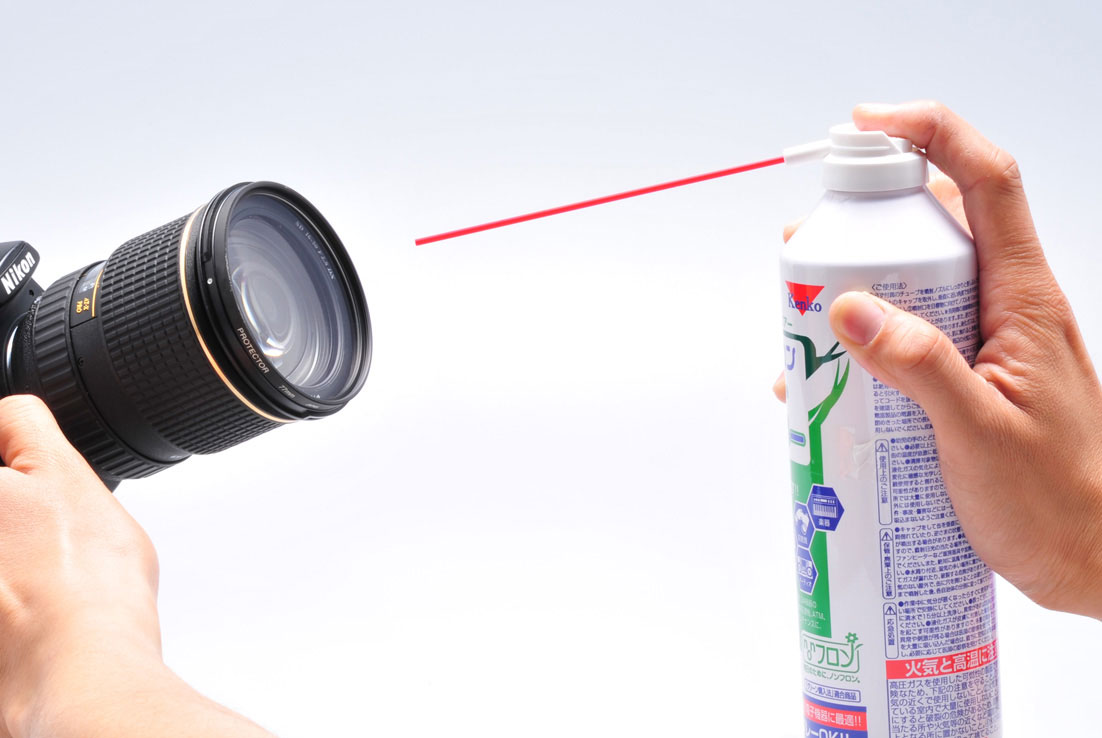
- Next, spry air with an air duster on the filter's surface to make sure there is no dust left. When doing so, keep the air duster at the appropriate distance according to the product instructions.
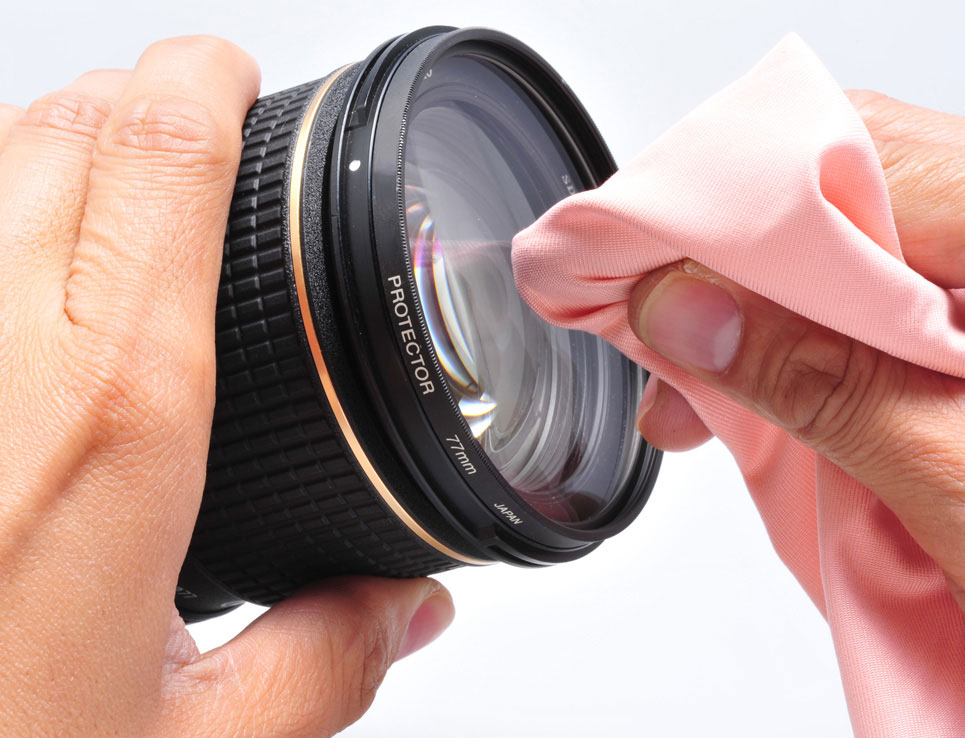
- In case of persistent dirt, apply a small amount of cleaning liquid on a cleaning cloth and gently wipe the filter's surface. Refrain from applying the cleaning liquid directly on the filter's surface. Make circular movements from the center outwards when wiping the surface and make sure to use only clean cloths each time.
- Even after wiping the dust off the filter's surface, blow off again any remaining dust particles with an air blower.
These simple steps can be also applied for a correct cleaning of your lenses as well.
Each interchangeable camera lens has its own minimum focusing distance, which is the distance from the lens to the shooting subject. Its range value generally varies from 25cm to 50cm minimum.
In close-up photography, you can close up on the subject by simply moving closer to it, as by doing so the size of the subject projected onto the image sensor will appear larger.
When you cannot move closer, or when you would like to close up more on the subject, you need to further shorten the minimum focusing distance. This can be done by installing a close-up filter (also known as close-up lens) on the lens.
Close-up filters usually come in different magnifications. Choosing the appropriate magnification is fundamental and can be easily done by considering the minimum focusing distance value of the lens.
For example, if the minimum focusing distance value is more than 1m, you will need a +1 or +2 close-up filter. If it ranges from 30cm to 50 cm, you will need a +3 or +4 close-up filters, and so on.
HOYA close-up filters come in +1, +2, +3, +4 and +10 magnification powers.
When installing close-up filters, the longest focusing distance of the lens at ∞ (infinity) will be reduced, its focusing range will change accordingly.
Focusing distance reference table when using close-up lens*
| Close-up filter magnification | Shortest focusing distance | Longest focusing distance |
|---|---|---|
| Without close-up filter | 50cm | ∞ (infinity) |
| +1 | 30cm | 100cm |
| +2 | 24cm | 50cm |
| +3 | 20cm | 33cm |
| +4 | 17cm | 25cm |
| +10 | 8cm | 10cm |
* The above calculation is based on master lens with the shortest focusing distance 50cm. The shortest focusing distance shows the distance between the object and the front part of the lens.
- Close-up lenses +1 and +2 are suggested for the lens with the shortest focusing distance 1m and more.
- Close-up lenses +3 and +4 are suggested for the lens with the shortest focusing distance 30-50cm.
- Close-up effect is the weakest when the lens with short focusing distance is used.
Follow the article "The best filters for winter season".
A filter being stuck on the lens can happen to anyone, but is principally no reason to panic as a stuck filter can most of the time easily be removed. There are various tricks on how to remove a stuck filter that this guide will talk about. The most important thing to remember is that you should never use excessive force when trying to remove a filter, as this can damage the filter or the lens.
In case you are using a filter with a rotatable frame, such as a CIR-PL, there is also a chance that it might be a problem with your grip instead. Pay attention to carefully grab the fixed part of the frame when trying to remove the filter, rather than the rotatable part.
Before starting
Before you start trying to remove a stuck filter, make sure to remove the lens from the camera body in order to avoid accidentally dropping it or causing damage to the camera or lens. Also, make sure to hold the lens without grabbing it with too much force in order to avoid causing damage to the inner workings.
Tips for removing the filter
Remove the filter with the help of a rubber surface
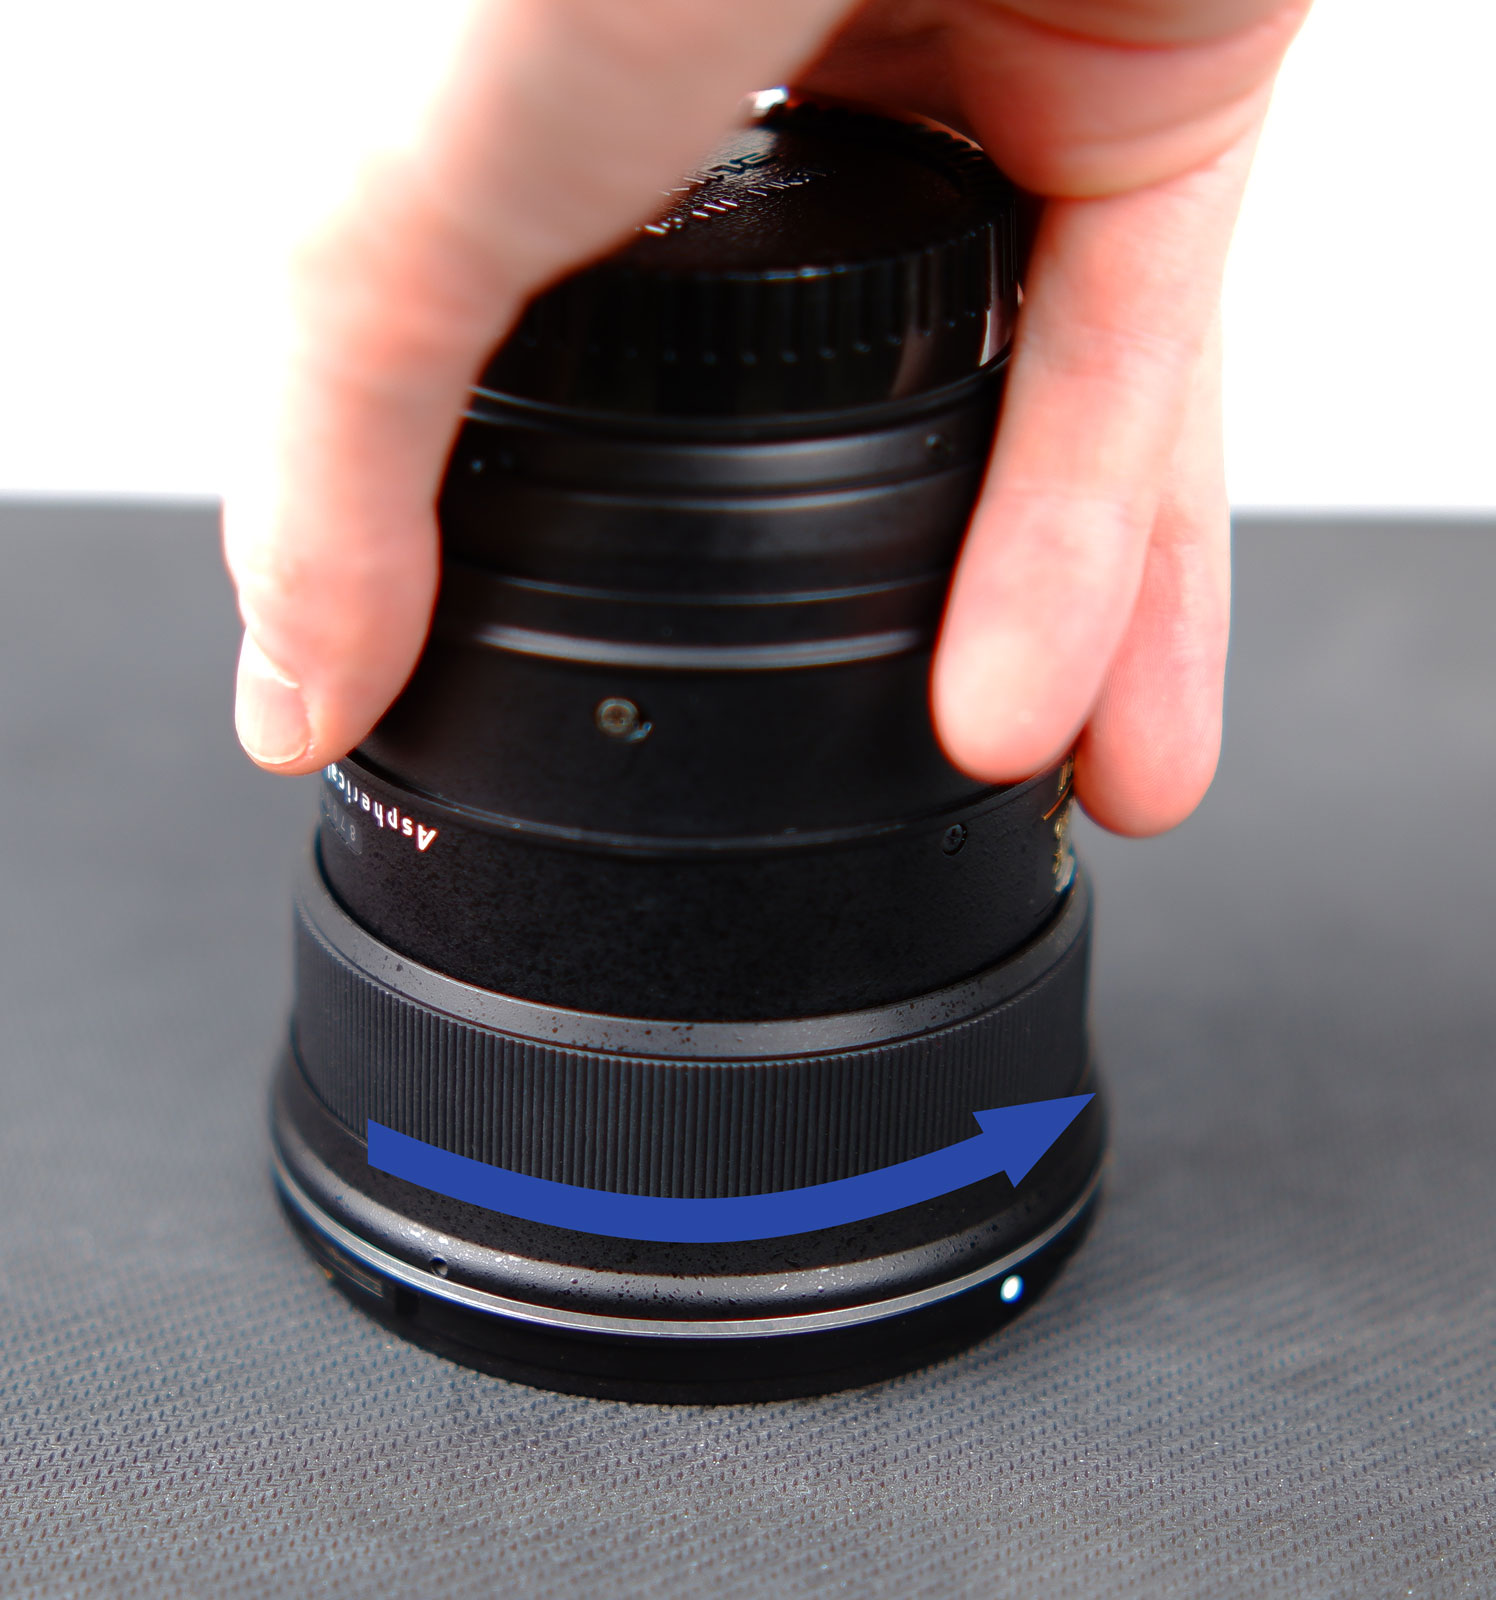
Try to remove the filter with the help of a rubber surface, e.g., a mouse pad or anti-slip mat – important is, that it has a lot of friction. Place the lens with the filter downwards on the rubber mat, then turn it while applying slight downward force. The evenly applied friction should loosen the lens filter more easily. Note that this tip cannot be used for filters with a rotatable frame, since the frame will just move along.
Remove the filter with the help of a rubber band
Try to remove the filter with the help of a rubber band. Place it around the filter frame without overlapping onto the lens. The rubber band will give you a better grip when turning the filter without requiring as much squeezing force, as well as more friction between the frame and rubber band. A wide rubber band is also convenient for filters with a rotatable frame, as it covers both the rotatable and fixed part, allowing you to have a good grip on both.

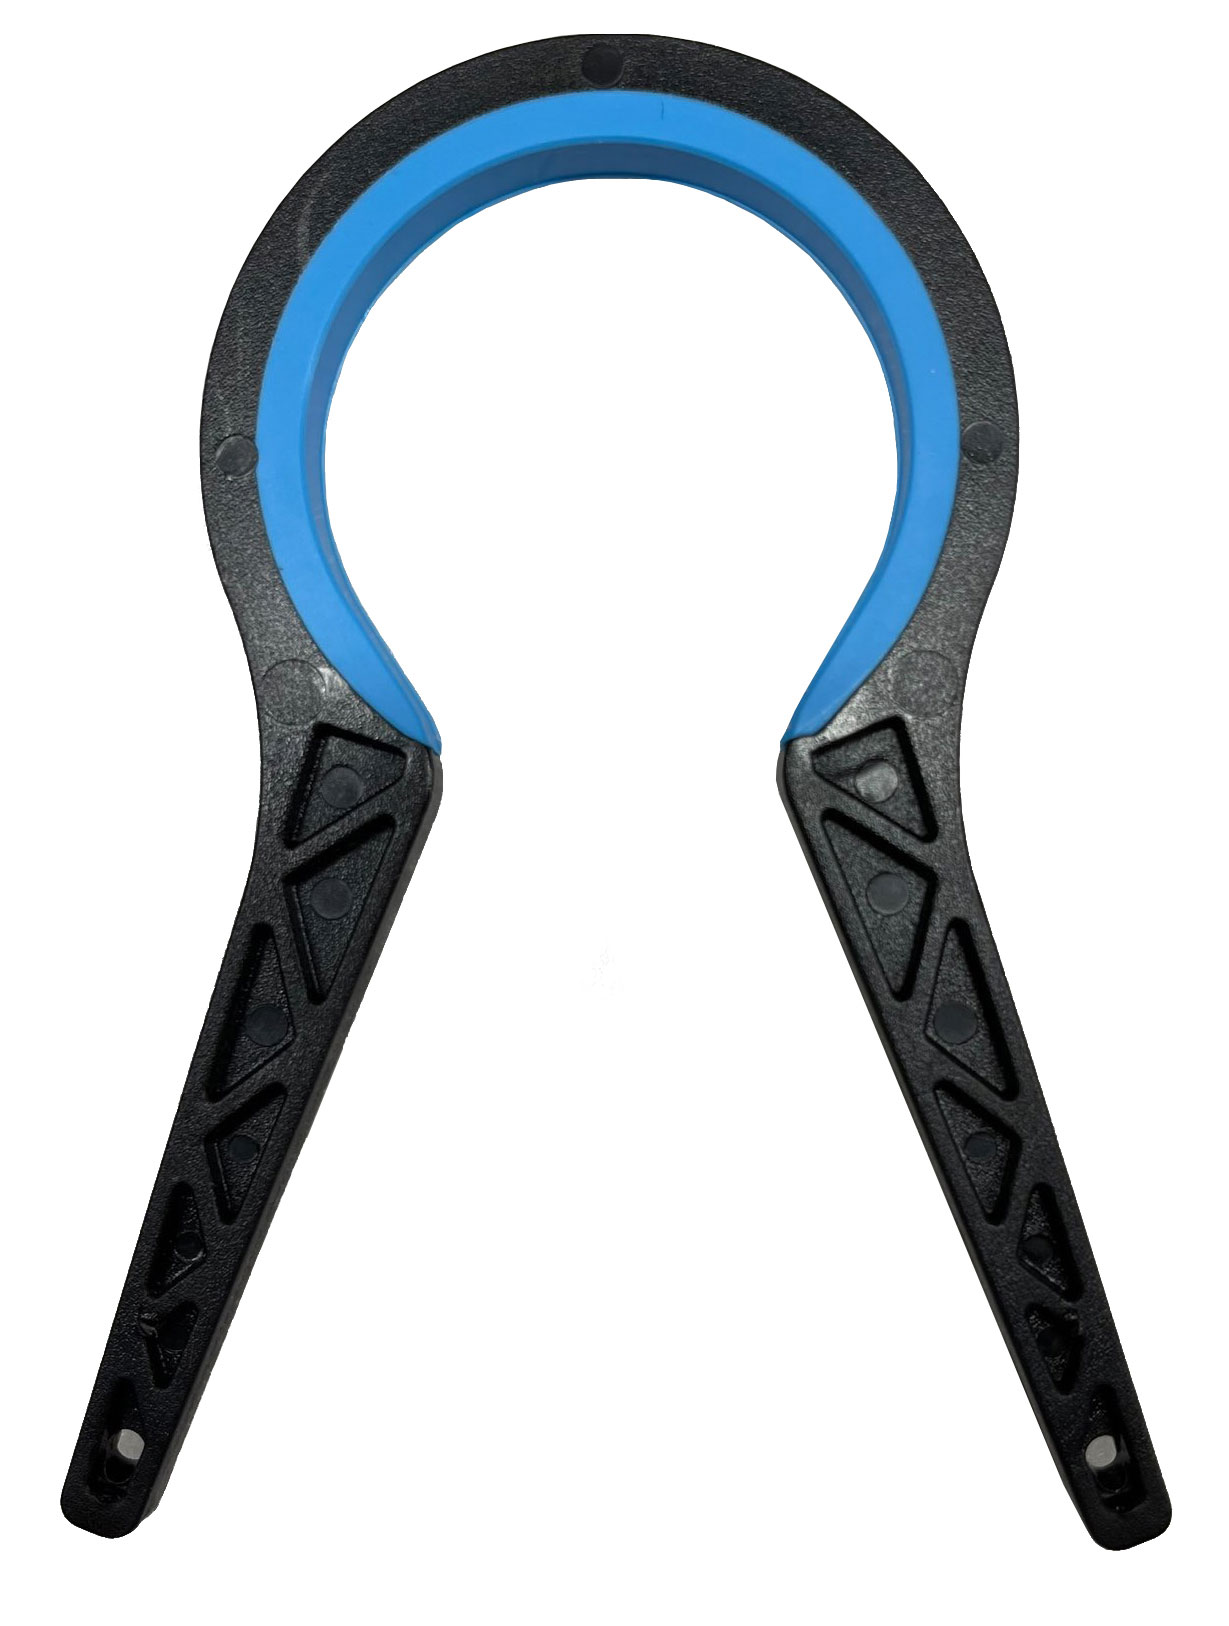
Filter wrenches
It is possible to purchase filter wrenches that are made for removing stuck filters. They are available in various sizes and types and usually cover a small range of filter sizes. It is an inexpensive investment worth carrying around when often using filters.
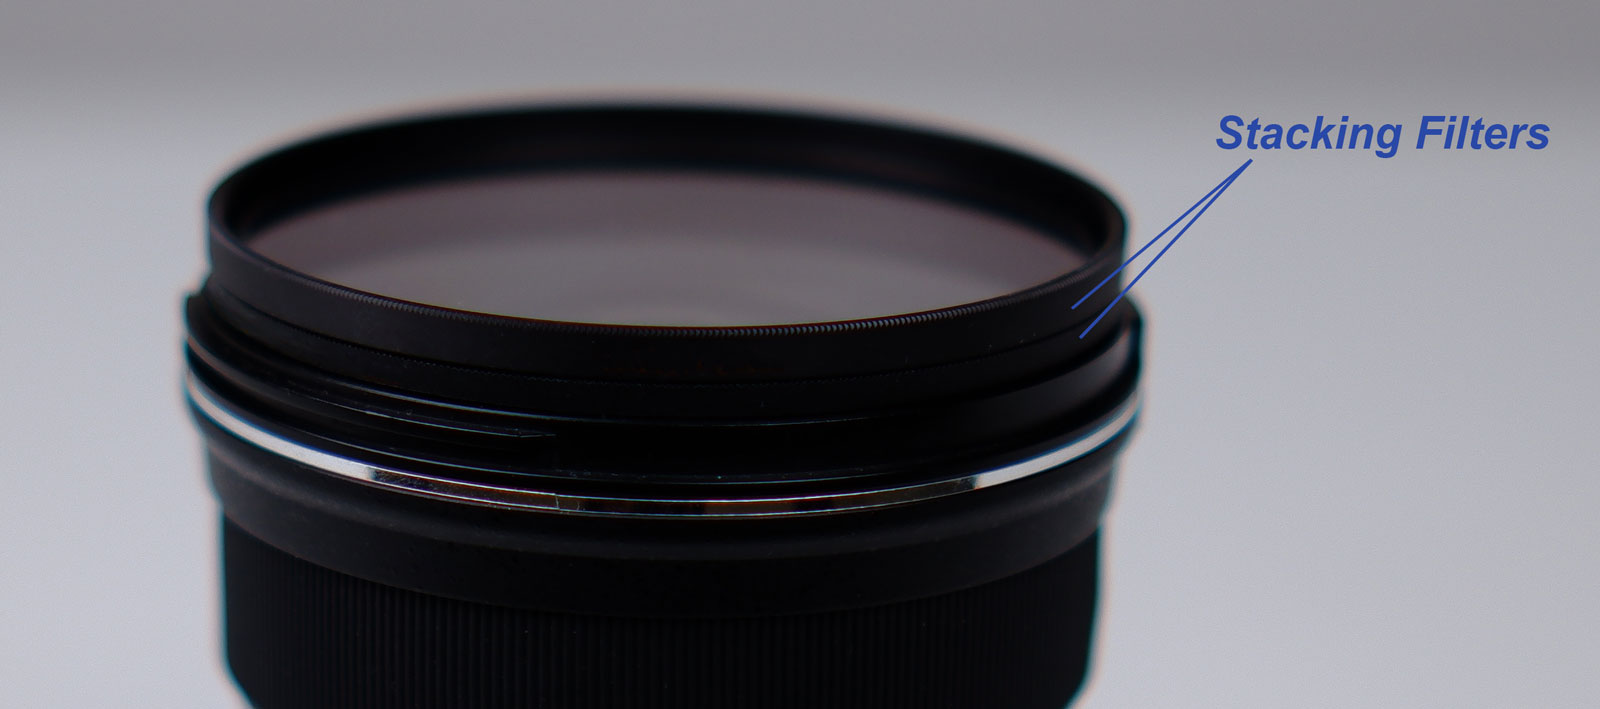
Using another filter or a step-down ring
Using another filter or a step-down ring is also a solution. If the stuck filter has a front thread, you can attach another filter on top of it. Don't tighten it too fast in order to not get it stuck as well. Now, grab both filters and try to unscrew them. Thanks to the increased surface area, you have a better grip that can help to unscrew the stuck filter.
Tap a finger or a hard object
A very effective method is to gently tap a finger or a hard object against the filter frame.
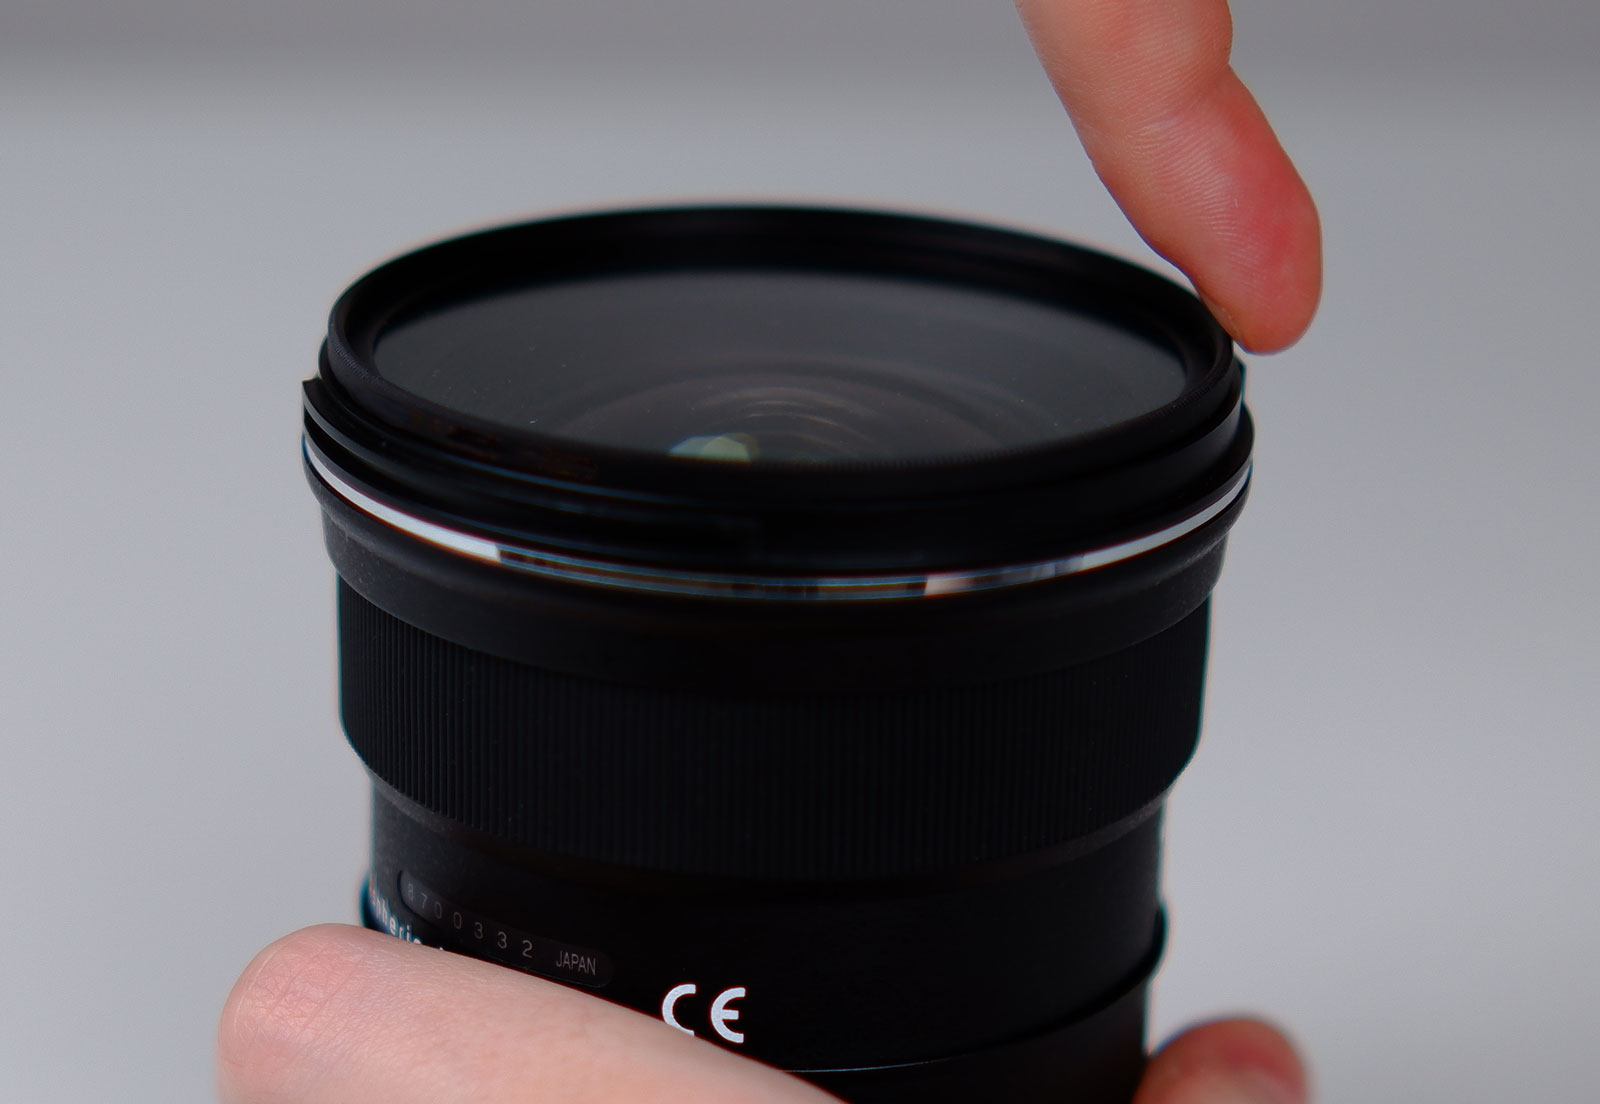
This light shock to the lens and filter can loosen the thread and be just enough to allow it to turn. Don't tap with too much force in order to avoid damage. You can additionally try to hold the filter with a light twisting force with the other hand while tapping it to make it work better.
There are further methods to remove a stuck filter that are more unreliable. If the tips above didn't solve the problem, we recommend taking it to a camera store at this point. Camera stores often deal with this problem and are experts in removing a stuck filter without damaging anything. Another advantage is that the staff can inspect the lens and filter afterwards for damage – to avoid future problems.
(Please note that Kenko Tokina Co., Ltd. does not take responsibility if lenses or filters have been damaged through inappropriate implementation of the above points. Correct implementation will not cause any damage.)